Rye bread has been made for hundreds of years. Before grocery stores and commercial bakeries, families baked bread using the grains they could grow or purchase locally. Rye was especially popular because it grew well in poor soils and colder climates. While traditional rye breads can be dense and hearty, this version is softer and makes excellent sandwiches. By combining rye flour with our everyday bread flour, we get the rich flavor of rye while keeping the loaf light enough for toast and lunch sandwiches. What You'll Need ¾ cup warm water (95–100°F) ⅓ cup active sourdough starter 2 tablespoons raw honey 2 tablespoons olive oil 1½ teaspoons salt 2½ cups organic unbleached all-purpose flour (13% protein) ½ cup organic rye flour 1½ teaspoons active dry yeast Optional: 1–2 teaspoons caraway seeds Add the warm water, honey, and yeast to the bread machine pan.
Allow the mixture to sit for about 5 minutes until slightly foamy. Kitchen Lesson Yeast feeds on sugar and produces carbon dioxide. Those tiny gas bubbles are what make bread rise and become soft instead of dense. Step 2: Add the Remaining Ingredients Add: sourdough starter olive oil all-purpose flour rye flour salt caraway seeds (if using) Start the Basic Bread cycle. Step 3: Check the Dough After about 5–7 minutes of mixing, look inside the bread machine. The dough should form a soft ball and pull away from the sides of the pan. If the dough is very sticky, add 1 tablespoon of flour. If the dough looks dry or crumbly, add 1 teaspoon of water. Kitchen Lesson Rye flour absorbs water differently from wheat flour. Every loaf may need a small adjustment depending on the humidity and age of the flour. Step 4: Let the Machine Work Close the lid and allow the machine to complete the cycle. Try not to open the lid repeatedly during the rise. Kitchen Lesson Bread rises best when the temperature remains steady. Every time the lid opens, heat escapes and can affect the rise. Step 5: Cool Before Slicing Remove the loaf from the bread pan and place it on a wire rack. Allow it to cool at least 20 minutes before slicing. Kitchen Lesson Bread continues to finish baking inside after it leaves the machine. Cutting too early can make the crumb gummy. What We Learned Rye flour adds flavor, color, and history to a loaf of bread. It reminds us that baking is not just about feeding our family. It is also about learning from the generations who came before us. This loaf may look a little different from our everyday sandwich bread, but that is part of the lesson. Different ingredients yield different results, and understanding those differences is what helps us become confident bakers. Homemaking is full of small lessons like this. Every loaf teaches us something new.
0 Comments
Step 1: Wake Up the Yeast
Add the warm water, honey, and yeast to the bread machine pan. Allow the mixture to sit for about 5 minutes. You should begin to see small bubbles or foam forming on the surface. This tells you the yeast is alive and ready to work. Kitchen Lesson Yeast is a living organism. It feeds on sugars and produces carbon dioxide, which creates the air pockets that make bread rise. Step 2: Add Remaining Ingredients Add: sourdough starter olive oil flour salt Select the Basic Bread cycle and start the machine. Step 3: Check the Dough After about 5–7 minutes of mixing, lift the lid and look at the dough. The dough should form a smooth, soft ball. If it looks too wet and sticky, add a tablespoon of flour. If it looks dry and crumbly, add a teaspoon of water. Kitchen Lesson Bread recipes are guides, not rules. Humidity, flour, and even the weather can affect dough. Learning what dough should look like is more important than memorizing measurements. Step 4: Let the Machine Work Allow the bread machine to complete its cycle. Resist the urge to keep opening the lid. Bread likes consistency. Step 5: Cool Before Slicing When the loaf is finished baking, remove it from the pan and place it on a wire rack. Allow it to cool for at least 20 minutes before slicing. Kitchen Lesson Fresh bread continues cooking internally after it comes out of the machine. Slicing too soon can make the loaf gummy. What We Learned This recipe taught us that more yeast is not always better. If a loaf rises too quickly, it can collapse during baking. Bread is a balance between patience and timing. Every loaf teaches something. Some loaves are prettier than others, but every loaf helps us become better bakers. And even the imperfect loaves usually taste pretty good with butter. There’s something special about those slow, cozy mornings when you want something homemade, but don’t have time for all the extra steps. This sourdough cinnamon roll bake came together on one of those busy Sundays when I needed simple, from-scratch, and dependable. Instead of rolling and shaping traditional cinnamon rolls, I used my bread machine dough, gently formed it into soft rolls, and pressed it into the pan like a rustic focaccia. That glossy cinnamon butter pooling in the dimples? It’s everything. Warm, rich, and just sweet enough, this bake gives you all the comfort of cinnamon rolls with a fraction of the effort, making it perfect for family mornings, after church, or anytime you want something special without the fuss. Ingredients (Add in this order to the bread machine)
1 cup warm milk (not hot, about 100–105°F) 1/4 cup of softened butter...I used ghee! 1 large egg 1/4 cup active sourdough starter (fed or discard both work) 3 1/2 cups of Kirkland Organic All-Purpose Flour 1/4 cup of organic cane sugar (you can reduce slightly if you prefer less sweet) 1 tsp of salt 2 1/4 tsp active dry yeast (or 1 packet) Bread Machine Settings Select Dough Cycle Let it fully mix, knead, and rise (about 1.5 hours) The sourdough adds flavor, but the yeast does the heavy lifting for a reliable rise *In a hurry? You can actually cut this drastically, as long as the dough is formed and is not sticky! Shaping the Rolls This is the different part because I was in a hurry: 1. Grease a 9x13 casserole dish (touching for pull-apart rolls) or a cast iron skillet 2. Once the cycle finishes, place the dough directly into the casserole dish. 3. Divide into 12–15 rolls. They can be touching...they will eventually after this next rise! 4. Once they are all shaped, now comes the fun part! 5. Using your fingertips, gently press down into each roll, creating soft dimples across the surface just like focaccia 6. Don’t flatten them completely; press enough to create little pockets for the butter and cinnamon mixture to settle into Mix: 3–4 tbsp melted ghee 1/2 cup brown sugar 1–2 tbsp cinnamon Spread your melted ghee, brown sugar, and cinnamon mixture all over the top, letting it fall into those pockets Quick Rise + Bake Cover and let rise about 10–20 minutes (just until slightly puffy) Bake at 350°F for 18–22 minutes, until golden and bubbling If you love the creamy sweetness of banana pudding and the tangy goodness of sourdough, this recipe is the perfect fusion for you! Making homemade muffins with kids is a fun learning activity and a great way to prepare a nutritious breakfast. You can even freeze extras and pack them as a go-to snack. Get out all your ingredients and measure each with your kids. Involve your kids as much as you can and encourage them to help clean up as you go. Using sourdough discard in this recipe enhances the flavor and texture of these muffins. Let’s dive into how you can transform simple ingredients into a delightful treat.
Ingredients: 1 1/2 cups Kirkland Organic Unbleached Flour 1 package vanilla pudding mix 1 teaspoon baking soda 1 teaspoon ground cinnamon 1/2 teaspoon salt 1/2 cup sourdough discard (fed or unfed) 1 egg, beaten 2 ripe bananas, mashed 1/2 cup brown sugar 1/3 cup coconut oil, melted 1/4 cup milk (or your choice of non-dairy milk) Optional Add-Ins: 2 tablespoons chia seeds (for extra nutrition) 1/4 cup dark chocolate chips (for a touch of indulgence) Instructions:
If you're tired of the traditional stovetop pancake routine and are craving a new culinary adventure, you're in for a treat. Today, we're diving into the world of sourdough sheet pan pancakes – a game-changer that combines the beloved flavors of sourdough with the convenience of a sheet pan.
Sourdough has been stealing the spotlight in kitchens worldwide and for a good reason. Its unique tangy taste and airy texture add a delightful twist to various recipes, and pancakes are no exception. Take this classic breakfast staple and transform it into a sheet pan masterpiece, save time, and create a feast for the eyes and taste buds. You will love how simple and delicious these sourdough sheet pan pancakes taste. Whether you're a seasoned sourdough enthusiast or a breakfast lover looking for a fresh twist, these pancakes will become a new favorite in your morning routine. Get ready to flip the script on your breakfast game and savor the magic of sourdough in every bite! Ingredients: Dry ingredients: 2 heaping cups of organic unbleached all-purpose flour 1 teaspoon baking soda 2 teaspoons baking powder 1 scoop of Levels Grass-Fed Vanilla Whey Protein (or 3 Tbs Sugar) 1 teaspoon salt Wet ingredients: 1 cup (more or less) sourdough starter (fed or unfed is fine) 1 ¾ cups milk 2 large eggs 2 Tablespoons organic coconut oil For the toppings: 1/4 fresh or frozen blueberries Optional: cinnamon, maple syrup, butter Directions: 1. Preheat oven to 425 degrees F. 2. Use parchment paper to line a 9×13 rimmed sheet pan and set aside. 3. In a large bowl, whisk together the dry ingredients. Next, whisk in the wet ingredients until combined and smooth. 4. Pour batter onto the prepared pan. Tilt the pan as needed to get it as level as possible. 5. Sprinkle with the blueberries. 6. Bake for 15-18 minutes until the pancake springs back to the touch. 7. Let it cool for a minute or two, then slice it into your preferred portions. 8. Serve with your choice of toppings! Make ahead directions: Wait until pancakes have cooled, slice into portions and then stick the pan in the freezer. Wait about two hours and remove from freezer. Each slice can be separated and placed in a reusable gallon pouch to be used throughout the week! Heat in a microwave wrapped in a paper towel for about 40 seconds. 
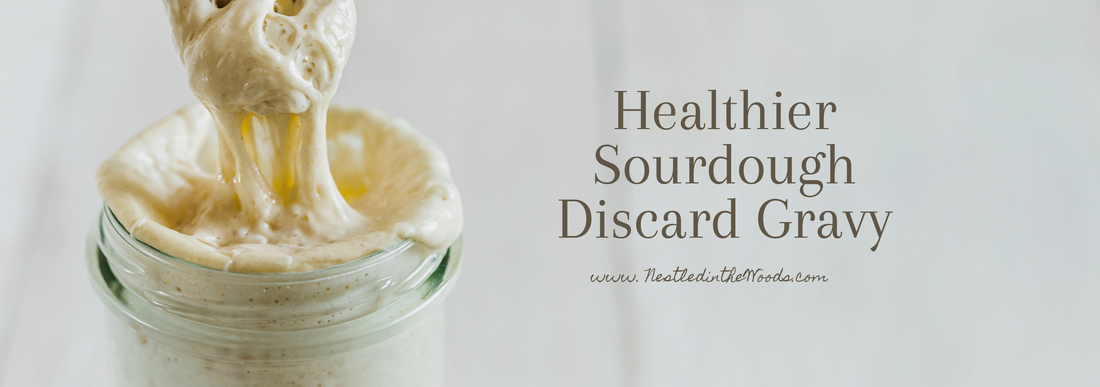
To all the health-conscious moms out there, we've got a game-changing twist for your steaks – a healthier, sourdough discard gravy. Packed with the goodness of fermented flavors and probiotics, this option not only reduces food waste but also brings an extra dose of nutritional benefits to your family dinner table.
Ingredients: Drippings from your cooked steak or chicken Sourdough discard (about 1/4 cup) Low-sodium broth (for a health-conscious choice) Salt and pepper to taste Optional: Fresh herbs like thyme or parsley for added nutrients Directions: Liquid Gold Collection: Begin by collecting those delectable drippings from the pan or pot – the base of your savory masterpiece. Sourdough Discard Addition: In the Instant Pot, add about 1/4 cup of sourdough discard to the drippings. Switch to "Sauté" mode, and stir the sourdough discard into the drippings. Allow it to cook for 1-2 minutes, infusing your gravy with the unique tanginess and gut-friendly benefits of sourdough fermentation. Low Sodium Broth Infusion: Opt for a low-sodium broth for a heart-healthy alternative. Gradually pour it into the pot while stirring continuously to maintain a balanced flavor profile. Let the mixture simmer until it thickens, absorbing the wholesome essence of the sourdough discard. Seasoning for Wellness: Season the gravy with salt and pepper to taste. Consider adding fresh herbs like thyme or parsley for an extra nutritional boost. Pour and Nourish: Once your gravy reaches the perfect consistency, generously pour it over your perfectly cooked steak or chicken. Embrace the satisfaction of serving a nutritious, flavorful meal that aligns with your health-conscious lifestyle. Moms, with this healthier sourdough discard gravy you're not just minimizing food waste; you're also infusing your cooked meat with the goodness of fermented nutrition. Enjoy the satisfaction of providing a meal that's as wholesome as it is delicious, making every bite a nourishing experience for your loved ones. 
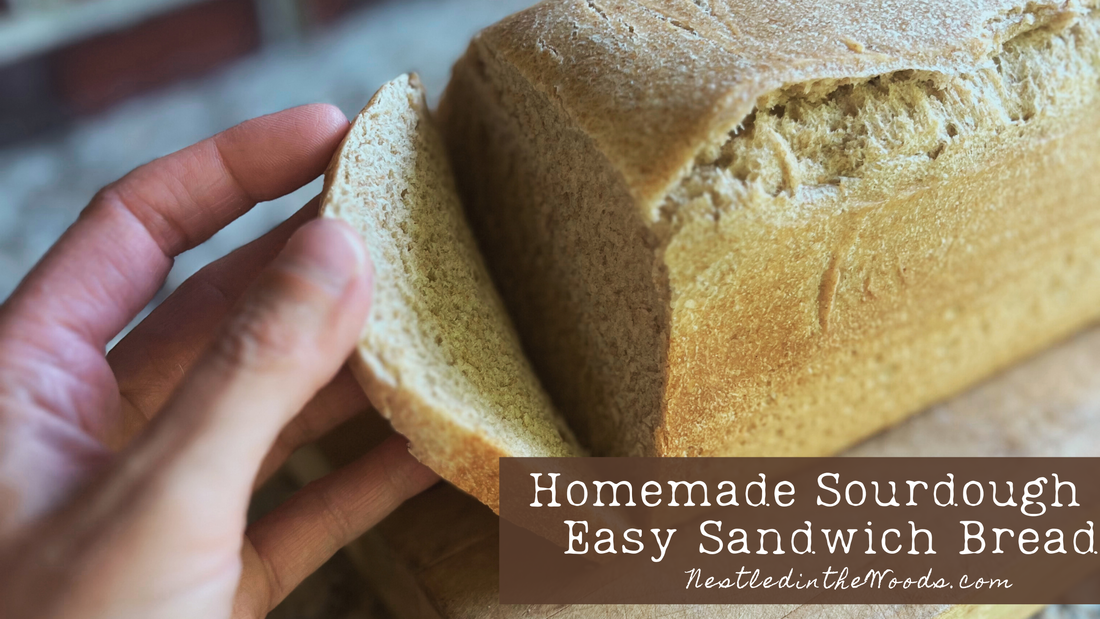
Calling all homeschool moms, join me in my kitchen as we indulge in the wonderful world of homemade sourdough sandwich bread together! Picture this: amidst the joys and challenges of homeschooling and the luxury of not rushing out the door in the morning, an easy recipe brings the whole family together - baking homemade sourdough sandwich bread! As the aroma fills your cozy kitchen, turning simple ingredients into a delicious loaf becomes a cherished part of your homeschool routine. Join me in embracing the art of breadmaking, adding a sprinkle of warmth to our homeschool days, and creating unforgettable moments with our loved ones. Enjoy slicing into pure homemade goodness and savor the satisfaction of nurturing bellies and hearts!
Ingredients: 1 cup warm water (at least 110 degrees) 1 Tablespoon active yeast 2 Tablespoons raw honey 2 Tablespoons olive oil 1 1/2 teaspoon salt 2 cups all-purpose unbleached flour 1 cup whole-wheat flour 1/3 cup unfed sourdough starter Directions:
And there you have it, a homemade sourdough sandwich bread filled with the love and satisfaction of baking it yourself. Now, go and make that ultimate sandwich, share it with loved ones, or simply savor each bite knowing you've mastered the art of breadmaking. Here's to many more baking adventures and countless moments of bread bliss! |
Under the Pines: Education & Everyday LifeInsights from Soaring Pine Private Academy: Homeschooling, Homemaking, and Holistic Learning.
Archives
June 2026
Categories
All
|

RSS Feed