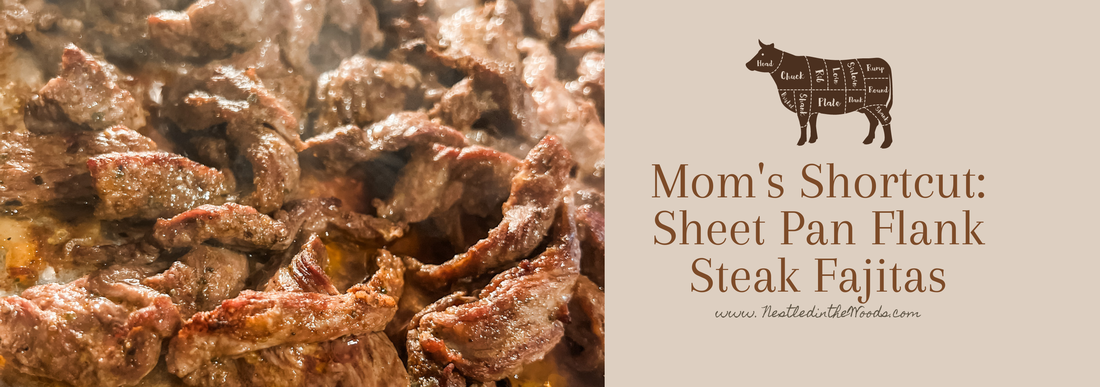
 Dear fellow moms, I understand the daily hustle and bustle you navigate, balancing many responsibilities while aiming to put a hearty, homemade meal on the table. I am excited to share a family-favorite recipe tailored to simplify your life without compromising flavor or nutrition. Sheet Pan Grass Fed Flank Steak Fajitas – a culinary lifesaver designed to make your evenings a breeze. A genuine time-saver, with minimal preparation and cleanup needed, this dish allows for more precious moments with your family and less time spent in the kitchen.
The magic happens on a single sheet pan, where all the ingredients (delicious grass-fed flank steak, colorful bell peppers, onions, and a blend of aromatic spices) mingle and meld together to create a symphony of flavors that will delight even the pickiest of eaters. Whether you're whipping up a quick weeknight dinner or hosting a casual gathering with friends, these Sheet Pan Flank Steak Fajitas are sure to impress. Moms grab your sheet pan, slice up some veggies, and get ready to savor the delicious simplicity of this mom-approved meal. You deserve a culinary shortcut that leaves you more time for what truly matters – making memories with your loved ones. Ingredients: 1 1/2 pounds grass fed flank steak, thinly sliced 4 teaspoons avocado oil, divided 1 red bell pepper, sliced thin 1 yellow bell pepper, sliced thin 1 yellow onion, thin sliced 1 tablespoon chili powder 2 teaspoons ground cumin 1 1/2 teaspoons oregano 1/2 teaspoon granulated garlic 1/2 teaspoon onion powder 1 lime Homemade sourdough tortillas, cilantro, avocado, lime wedges and any other toppings you like. Directions: 1. Preheat the oven to broil and adjust the rack to the upper third position. 2. Line your sheet pan with foil and drizzle a little avocado oil. 3. In a small bowl combine all of the spices. 4. Add the sliced peppers and onions to the pan and drizzle with 2 teaspoons of avocado oil, half of the mixed spices, salt, and pepper. 5. Toss together until well-coated, then spread them into a single even layer. 6. Broil for 5 minutes or until just tender. 7. While the veggies are broiling, add all the flank steak to a bowl and combine with the remaining spices and oil. Toss to coat. 8. Remove the pan from the oven and push the peppers and onions all to one side. 9. Add the sliced steak to the pan spread into a single layer and broil for 3-5 minutes or until the steak is cooked to your liking. 10. Take out from the oven and drizzle lime juice over the dish. Serve alongside homemade sourdough tortillas, avocado slices, fresh cilantro, or any other toppings you would like.
0 Comments
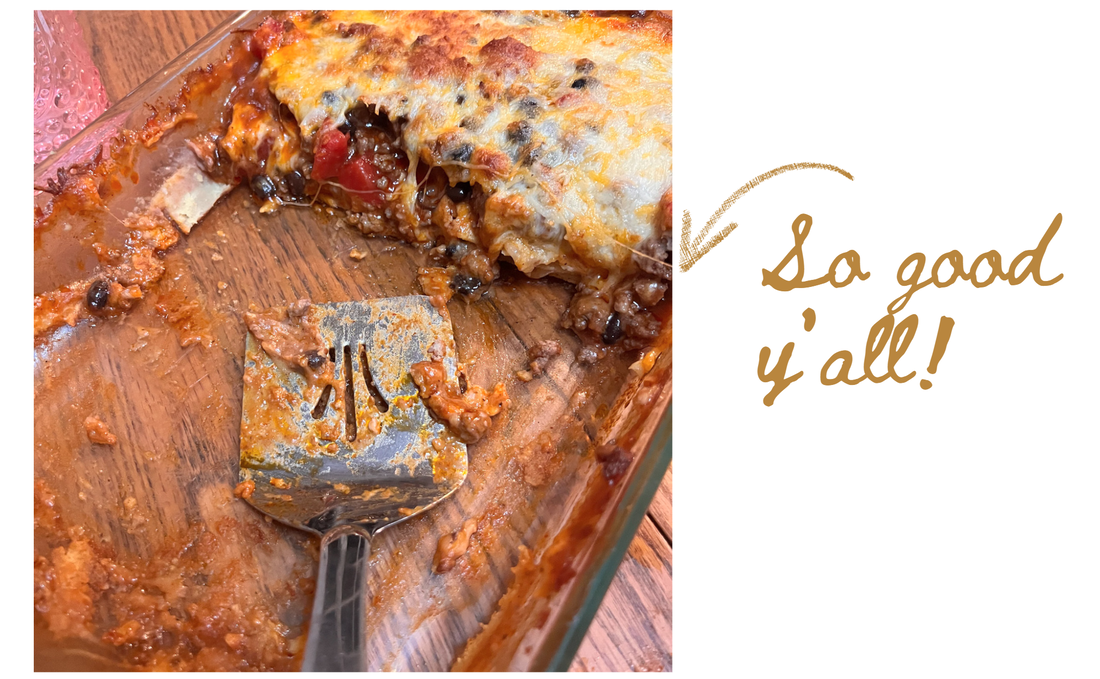
 I have a passion for crafting homemade dishes, and I'm always up for the challenge of creating pantry staples from scratch. Not only is it an enjoyable endeavor, but it also puts the flavor entirely in my hands! Last December, we whipped up this delightful dish, and the reactions were priceless. With my husband exclaiming, "Wow!" and my kids asking for seconds and thirds, it was undoubtedly a win. To recreate this culinary triumph, prepare creamy refried beans in the Instant Pot, then whip up a savory enchilada sauce on the stovetop as your meat cooks. Finally, assemble everything into layers, generously smothered in that irresistible homemade enchilada sauce, resulting in a dish guaranteed to elicit smiles and satisfaction with every bite! Ingredients:
Directions:
 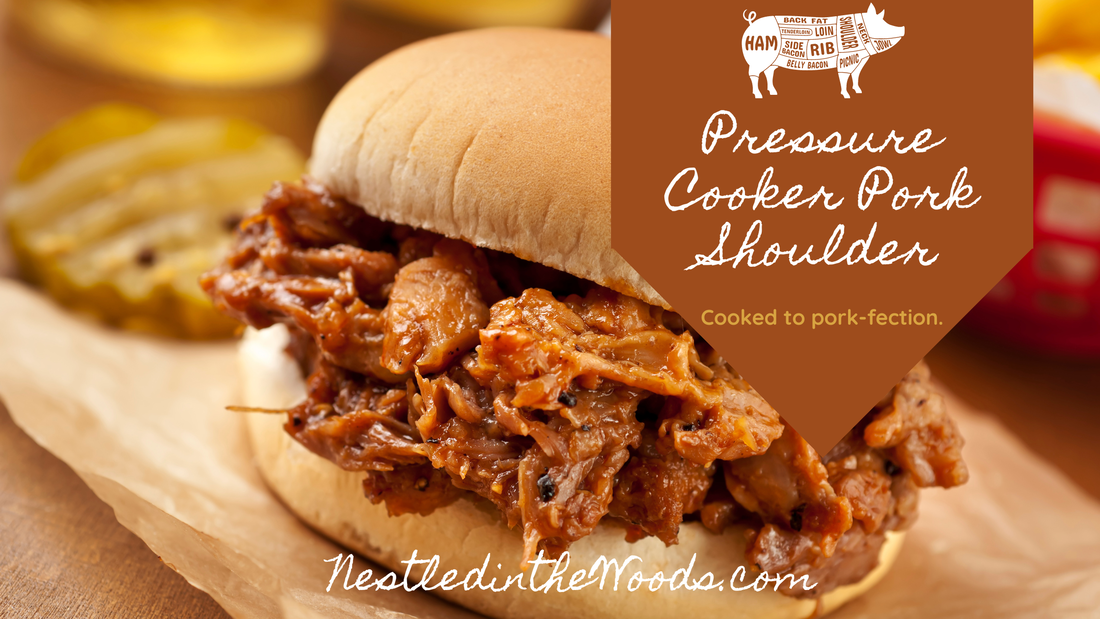 Pulled or shredded pork is one of the most delicious dishes for a party or picnic! Among all pork recipes, pulled pork is the most versatile, used to make sandwiches, tacos, burritos, and salads, or it can also be eaten as a meal! This yummy dish is ready in just over an hour using a pressure cooker.
Ingredients: 3 pounds pork shoulder, bone-in 12 oz light beer (you could also use one cup of chicken broth or ginger ale.) 3 tablespoons brown sugar 1 tablespoon kosher salt 1 tablespoon smoked paprika 1 teaspoon ground mustard 1 teaspoon garlic powder 1 teaspoon onion powder 1 teaspoon ground pepper ¼ teaspoon cayenne pepper 1 cup BBQ sauce, more to taste Directions:
The juice that the roast is cooked in will be a combination of beer and the fat from the roast. Use this to spoon over the shredded pork before you put barbeque sauce on it. The flavor of the juice will enhance the flavor of the pork. Mix in your favorite fav BBQ sauce. Here's my homemade BBQ sauce recipe. |
WElcome!I am a homemaker and Home Educator of our four children at Soaring Pine Private Academy. Gratitude fills my heart for each day that God blesses me with my sweet family. I invite you to explore my blog, where I share our homeschooling adventures from our home nestled in the woods, along with delightful recipes and more!
Archives
April 2024
Categories
All
|
 RSS Feed